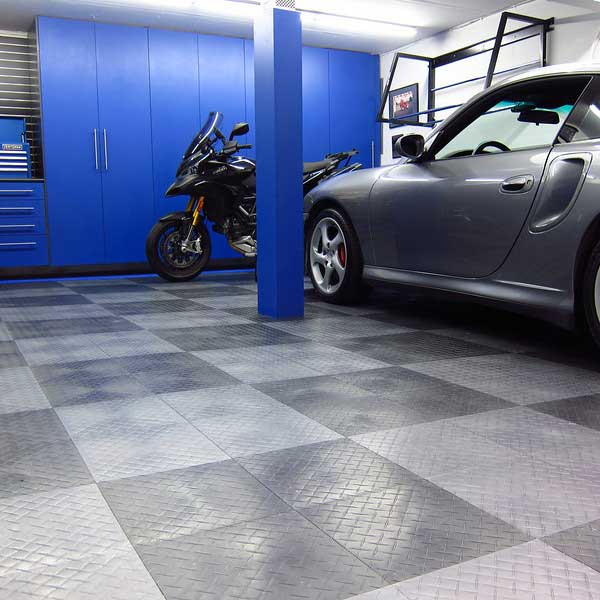
Embarking on a garage floor upgrade with versatile garage floor tiles or protective garage floor mats is an exciting project. The ease of installation for these options often makes them a popular DIY choice. However, before you click “add to cart,” there’s one critical step that can make or break your project’s success and budget: accurate measurement. Underestimating or overestimating your needs can lead to frustrating delays, unnecessary waste, or even mismatched batches if you have to reorder.
At Garage Flooring LLC, we’re here to ensure your project goes smoothly from start to finish. This comprehensive guide will walk you through the precise steps to measure your garage for tiles or mats, guaranteeing you order just what you need.
Why Accurate Measurement is Non-Negotiable:
- Prevent Under-Ordering: Running out of material mid-project is a major headache, causing delays and potential shipping costs for small reorders.
- Avoid Over-Ordering Waste: Unused tiles or mats can be a costly leftover, tying up your budget.
- Ensure Batch Consistency: Especially with tiles, slight color variations can occur between manufacturing batches. Ordering enough the first time ensures all your material comes from the same batch, preventing mismatched shades.
- Optimize Layouts: Knowing exact dimensions helps you plan patterns and cuts, minimizing waste and ensuring a professional finish.
Essential Tools You’ll Need:
- Tape Measure: A long, retractable tape measure (25-50 feet) is ideal.
- Pad and Pen/Pencil: For sketching your garage layout and noting down measurements.
- Calculator: For quick area calculations.
- Helper (Optional but Recommended): A second set of hands makes measuring large spaces much easier and more accurate.
Step-by-Step Measurement Process (Applies to Both Tiles & Mats):
- Clear the Area: For the most accurate measurements, remove as many items from your garage floor as possible. This allows you to measure right up to the walls and around any obstacles.
- Draw a Simple Diagram: Sketch a basic outline of your garage floor on your notepad. Don’t worry about artistic talent; this is just a map for your measurements. Include any doorways, columns, water heater cutouts, or other fixed obstacles.
- Measure Overall Length and Width:
- Measure the length of your garage from one end to the other (e.g., from the garage door to the back wall). Do this in a few different spots along the length to check for consistency. Use the longest measurement if there’s a slight variation.
- Measure the width of your garage from side wall to side wall, again in a few spots. Use the widest measurement.
- Record these measurements (e.g., Length: 20 ft, Width: 18 ft).
- Account for Irregular Shapes and Obstacles:
- If your garage isn’t a perfect rectangle (e.g., an L-shape, an alcove), break it down into smaller, simpler rectangles. Measure each section individually and add their square footage together.
- For fixed obstacles (columns, water heaters, built-in cabinets): Measure the length and width of these obstacles and calculate their square footage. You will subtract this from your total area.
- Measure the width of doorways. If you want flooring to extend into the doorway, measure that specific depth.
- Calculate Total Square Footage:
- Multiply your overall Length by your overall Width (e.g., 20 ft x 18 ft = 360 sq ft).
- If you have irregular sections, calculate each rectangle and add them together.
- Subtract the square footage of any obstacles you measured.
- This gives you your total usable square footage.
Specific Considerations for Garage Floor Tiles:
- How Tiles are Sold: Our garage floor tiles are typically sold by the individual tile or by the box (which covers a certain number of square feet).
- Calculating Tile Count:
- Once you have your total square footage, divide it by the square footage of a single tile (e.g., if a tile is 1 ft x 1 ft = 1 sq ft, you need 360 tiles for 360 sq ft). Or, divide your total by the square footage covered by one box.
- Adding for Waste/Cuts: It’s almost impossible to install tiles without some cuts. We highly recommend adding 5 to 10 extra of each color to your final tile count to account for cutting mistakes, odd shapes, or future replacements. For very complex layouts or first-time DIYers, aim for 10.
- Using Our Tile Designer Tool: For complex layouts, multi-color designs, or simply visualizing your project, our online Tile Designer Tool is invaluable! You can draw your exact garage shape, drag and drop different tiles, and the tool will calculate the number of tiles needed for each color.
- Important Note: While the Tile Designer Tool provides excellent estimates, always confirm the most up-to-date pricing on the individual product pages before purchasing, as prices can sometimes update slower on the designer.
Specific Considerations for Garage Floor Mats:
- How Mats are Sold: Garage floor mats are typically sold in specific, large dimensions (e.g., 7.5 ft x 17 ft, 8.5 ft x 22 ft).
- Match to Vehicle Parking Area: Decide if you want the mat to cover just the area under your vehicle’s wheels, or the entire footprint of the vehicle. Measure the length and width of your parked vehicle and add a few feet to each side for comprehensive protection.
- Multiple Mats: If you plan to use multiple mats for full coverage, measure the total area and select mat sizes that minimize seams and waste. Note that mats generally do not interlock, so they will butt up against each other. Center strips may be needed to avoid expansion issues when butting mats together.
Final Check: Measure Twice, Order Once!
Before placing your order, take a moment to double-check all your measurements. Walk around your garage with your diagram and verify every dimension. A few extra minutes now can save you headaches later.
Accurate measurement is the first crucial step towards a successful and satisfying garage floor transformation. With these tips and the right materials from Garage Flooring LLC, you’ll be well on your way to a perfectly fitted and beautiful garage floor!
Ready to measure your way to a new garage floor?


